Reseed hosts play a crucial role in integrating new routers into the I2P network. When a new router is set up, it requires an initial group of nodes to establish connections. Reseed hosts facilitate this by providing a starting list of nodes during the router's bootstrapping process. Moreover, existing routers occasionally need to undergo reseeding, particularly when they face difficulties connecting to the network, often due to their current known nodes being inaccessible.
The reseeding process is securely conducted over an encrypted connection, ensuring the integrity and authenticity of the bootstrap information. Each piece of information received during reseeding is digitally signed by the reseed host. This security measure effectively prevents any unauthorized sources from disseminating false or malicious data, thereby maintaining the network's reliability and security.
Step 1 - We want to update the server and install the required packages to install and run the reseed server.
sudo apt update && sudo apt upgrade -y && sudo apt-get install golang-go git make docker.io docker-compose -y
Step 2 - We need to pull the reseed-tools repo created by idk. Note: Change the home directory to where i2p is installed. For example if you followed our guide you will want to change the command to read "cd /home/i2p/".
cd /home/i2p
git clone https://i2pgit.org/idk/reseed-tools
cd reseed-tools
make build
sudo make install
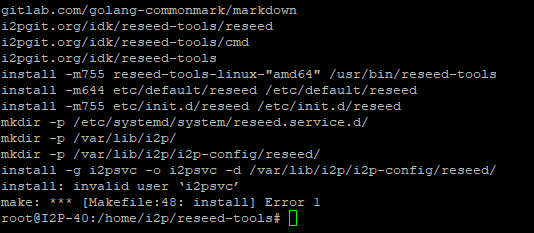
Note: This "install" invalid user 'i2psvc' is expected. We will run this reseed service as the same user as the I2P router.
Step 3 - We will want to change two values for better performance and to run a better reseed server. We will change the number of routerInfos included in each su3 file. This will allow us provide more routerInfo than the default of 77. We will change the number of su3 files that are built.
sed -i '/Value: 77/{s/77/100/;:a;n;ba}' cmd/reseed.go
sed -i '0,/Value: 50/{//s/50/4/}' cmd/reseed.go
sed -i 's/NumRi: 77/NumRi: 100/' reseed/service.go
make build

Step 4 - Now we will need to generate an SSL certificate for the reseed server. Use the following command and make changes that suite your environment. Run the command, select yes to generate the keys, and then cancel the script with CRTL +C.
i2p - This is the user that you installed the I2P router & reseed server.
--signer=admin@stormycloud.org - Change this to your email address, this could be clearnet or an I2P email.
--netdb=/home/i2p/.i2p/netDb - This should be your I2P Router netDb file.
--port 8443 - This is the port the reseed server lives on. This can be left default or changed to anything that works for your environment.
su - i2p -c 'reseed-tools reseed --signer=admin@stormycloud.org --netdb=/home/i2p/.i2p/netDb --port=8443 --ip=127.0.0.1 --trustProxy'

Step 5 - Ensure to securely back up the generated keys for server restoration or expansion. Store them in a safe, encrypted location with limited access.
Step 6 - Next we will create a system service so this can service can run without the use of scripts. You will want to change the service variables that match your environment. These will be the same as in step 4.
sudo tee /etc/systemd/system/reseed.service <<EOF
[Unit]
Description=Reseed Service
After=network.target

[Service]
User=i2p
WorkingDirectory=/home/i2p
# Environment=VARIABLE_NAME=value
ExecStart=/bin/bash -c 'reseed-tools reseed --signer=admin@stormycloud.org --netdb=/home/i2p/.i2p/netDb --port=8443 --ip=127.0.0.1 --trustProxy'
Restart=always
RestartSec=10

[Install]
WantedBy=multi-user.target
EOF

sudo systemctl daemon-reload
sudo systemctl enable reseed
sudo systemctl start reseed
Step 7 - Now the reseed service will be running, you can verify this by running the following command.
systemctl status reseed.service

STep 8 - This step is optional, but I dont like offering older su3 files so we have a crontab job to restart the reseed server every 3 hours.
echo "0 */3 * * * systemctl restart reseed" | crontab -
A reverse proxy is a server that sits between users and web servers. When users send requests (like loading a webpage), the reverse proxy takes these requests and sends them to the appropriate web server. It's like a middleman that handles incoming traffic to help improve performance and security and manage traffic flow to different servers.
Step 1 - We recommend using Nginix Proxy Manager it allows for easy management of hosts and SSL certificates. We will deploy this using docker.
docker run -d \
  --name nginx-proxy-manager \
  -p 80:80 \
  -p 81:81 \
  -p 443:443 \
  -v $(pwd)/data:/data \
  -v $(pwd)/letsencrypt:/etc/letsencrypt \
  --restart unless-stopped \
  jc21/nginx-proxy-manager:latest
Step 2 - Visit your server over port 81 (eg 23.128.248.250:81) you might need to disable your firewall temporarily to allow you to visit this link. Log into the admin panel and change the default username and password.
Default Admin User
Email:    admin@example.com
Password: changeme
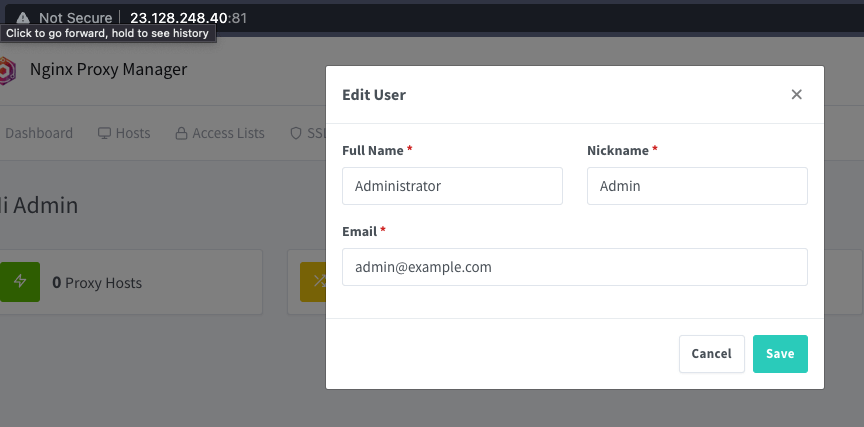
Step 3 - To add the reseed service click on Hosts > Proxy Host > Add Proxy Host.
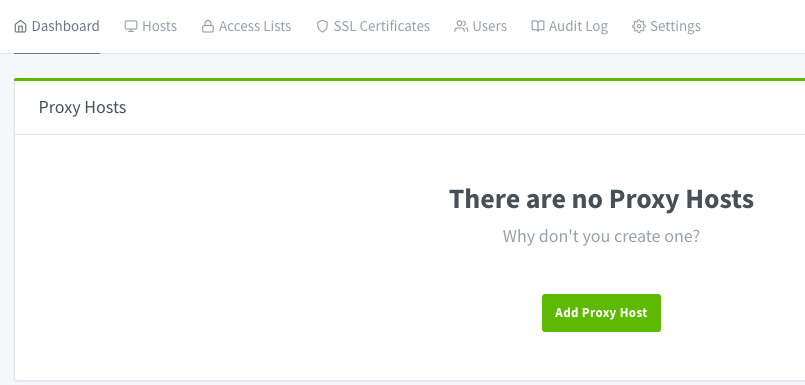
Step 4 - Add the information for the reseed server. Use the below example as a guide to match your environment.
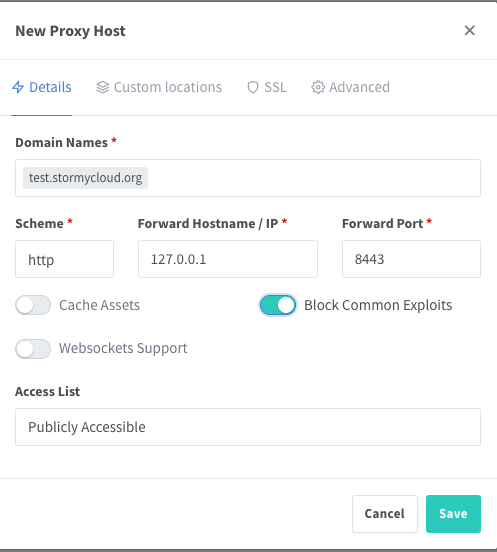
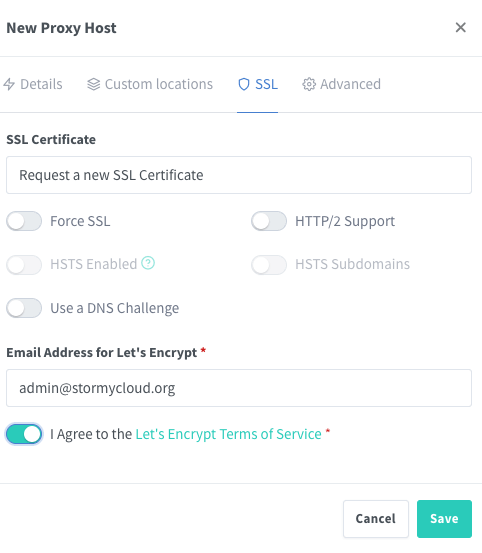
Step 5 - Click on the SSL tab. Select the Request a new SSL certificate. Enter your email address and agree to the terms. After that you can select Save.
Step 6 - If everything was successful if you browse the domain you entered the following screen should appear.

You will want to re-enable your firewall but allow port 80 (HTTP) & 443 (HTTPS) to be accessible.
Step 7 - Now you will want to send an email to zzz@mail.i2p (I2P) or zzz@i2pmail.org (Clearnet) with the following information.
Reseed website URL
Public reseed su3 certificate
Your contact email